This article is for those who need to know how to connect an iPad to a projector. Whether you’re trying to do this at home or for an event, these tips will help you get started.
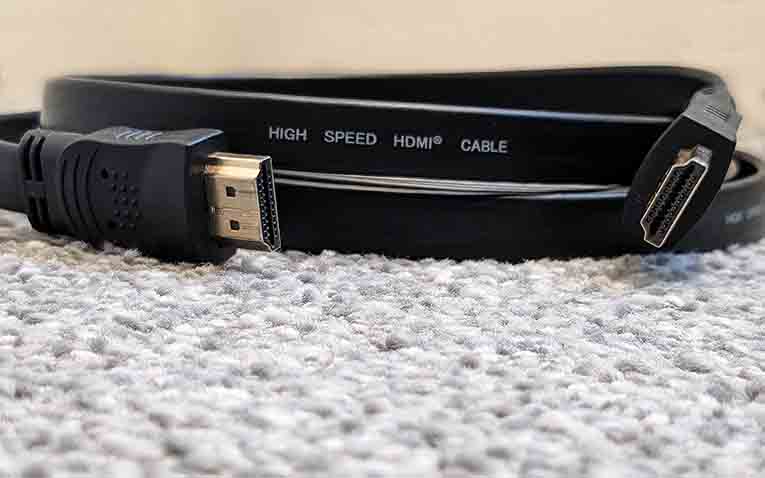
To start, make sure everything is turned off before turning on the projector and restarting your iPad. You’ll need an HDMI cable and the official Apple Lightning to HDMI adapter to connect your iPad to a projector.
Colin wrote this!
writer/editor at weavemymat.com

An avid technologist, having spent many years working in technical industries, and specializing in all kinds of tech stuff.
Check out more about him here!

The adapter is necessary to get video signal from your iPad to your projector.
If you run into any issues during the process, check out the trouble-shooter below. Keep in mind that the resolution may be different and the projector may crop your image, but you can still zoom out or play videos from YouTube.
Key Takeaways
- Turn everything off before starting and use an HDMI cable with the official Apple Lightning to HDMI adapter
- Troubleshoot issues by restarting your devices and selecting the HDMI input on the projector
Why Hook Up an iPad to a Projector?
Hooking up your iPad to a projector is a great way to display your content on a larger screen. Whether you’re at home or at an event, read on to find out how connecting an iPad to a projector with HDMI works.
It is important to note that it is recommended to use an HDMI cable instead of a VGA cable as it provides better resolution and consistency.
Apple Lightning to HDMI Adapter
If you’re playing video from your iPad, you won’t see it on the iPad screen; it will only be displayed on the projector.
Overall, hooking up your iPad to a projector is a simple process that can produce great results. Whether you’re using it for presentations or to watch videos, it’s a convenient way to display your content on a larger screen.
How to Connect an iPad to a Projector
With your HDMI cable, and official Apple lightning to HDMI adapter to hand, let’s get started!
Connecting your iPad to a Projector – Step by Step
Step 1
Before you start hooking up your iPad to a projector, it is important to make sure that everything is turned off. (This includes both the projector and the iPad.)
Step 2
Once everything is turned off, restart your iPad. This is a crucial step that will ensure that your iPad is ready to connect to the projector.
Step 3
Once your iPad is restarted, turn on the projector.
Step 4
Connect the HDMI cable to the projector and to the official Apple lightning to HDMI adapter. (Some projectors may have multiple HDMI inputs, so always plug it into HDMI 1 and look for that input on the list.)
Step 5
Once the cable is connected, plug it into your iPad.
Step 6
Locate the source search, or input select button and select your HDMI input. (HDMI1)
Should you encounter any issues during this process, they will probably be resolved by turning the projector off and back on again.
Using HDMI Cable
When you connect your iPad to the projector using an HDMI cable, the resolution or video size from the iPad may be different than what’s native to the projector.
This is no big deal as you can generally zoom out to make it fill the screen. However, be aware that the resolution may change depending on the content.
For example, if you open a YouTube page and hit play, the resolution will change. Keep in mind that the projector will crop your image if the resolution is different.
When playing video from the iPad, you won’t see it on the iPad screen. Instead, it will be projected onto the screen.
This is great if you’re using it for presentations as you can keep scrolling through your presentation while it’s projected for your audience to see.
Official Apple Lightning to HDMI Adapter
If you want to display your iPad’s screen on a projector, you will need the Official Apple Lightning to HDMI Adapter. This adapter is specifically designed to transfer video signal from your iPad to an HDMI-equipped display, such as a projector or a TV.
Overall, the Official Apple Lightning to HDMI Adapter is a simple and effective solution for displaying your iPad’s screen on a larger display.
Troubleshooting Steps
If you encounter any issues while trying to connect an iPad to a projector, don’t worry, it’s a common problem. Here are some troubleshooting steps that can help you resolve the issue.
Firstly, make sure that everything is turned off before you start. Turn off the projector and restart your iPad. This can resolve most of the issues that you might face during the process.
If you’re using an Epson projector, press the source search button to scroll through all the inputs looking for a signal. For other projectors, you might need to use a different button like source search or input select to select your HDMI input.
Sometimes, the image won’t fill the screen the same way as the blue section did when it first loaded up. This is because the resolution or video size from the iPad is different than what’s native to the projector. To fix this, you can generally zoom out to make it fill the screen.
If you’re playing video from the iPad, you won’t see it on the iPad, it’ll take all the video and put it on the projector for you. However, the resolution might change depending on the content. So, if you open a YouTube page and hit play, the resolution will change.
If you experience any issues with the adapter, such as no video signal or a poor quality image, try restarting your iPad and/or the display. It’s also a good idea to check that the HDMI cable is securely connected to both the adapter and the display.
With these troubleshooting steps, you can easily hook up your iPad to a projector and enjoy your videos or presentations.
Dealing with Resolution Differences
When connecting your iPad to a projector, you may notice that the image does not fill the screen the same way that the blue section did when it first loaded up.
This is because the resolution or the video size from the iPad is different than what’s native to the projector.
However, this is no big deal, and you can generally zoom out to make it fill the screen.
It’s essential to realize that the resolution will change depending on the content.
For instance, when you open a YouTube page and hit play, the resolution will change. This means that the projector will crop your image.
You won’t see the video on the iPad; instead, it’ll take all the video and put it on the projector for you. This works quite well, especially when you’re using it for presentations.
If you’re getting hung up on the resolution differences, try adjusting the zoom or restarting your projector and iPad.
Using YouTube
When using your iPad to connect to a projector, you can easily play YouTube videos and other online content. Simply open the YouTube app and select the video you want to play.
Once you hit play, the video will automatically be displayed on the projector screen.
One benefit of using YouTube with your iPad and projector is the ability to continue browsing and selecting videos while the current video plays on the projector screen.
This can be useful for presentations or events where you want to display multiple videos in a row.
Overall, using YouTube with your iPad and projector is a simple and effective way to display online content for your audience.
Just remember to adjust the settings as needed to ensure the video is displayed properly on the projector screen.
To Sum Up…
Congratulations! You have successfully learnt how to connect an iPad to a projector using HDMI.
By following these simple steps, you can now enjoy high-quality audio-visual content from your iPad on a larger screen.
Remember to start with everything turned off, restart your iPad, and turn on the projector before connecting the HDMI cable to the official Apple lightning to HDMI adapter.
If you encounter any issues, try restarting the projector or the iPad again.
Also, when playing videos from the iPad, the video will be displayed on the projector, not on the iPad.
Enjoy your newly connected iPad and projector setup!
You may also like – How can I make my projector Bluetooth capable?- Guide
Connecting an iPad to a Projector using HDMI – FAQ
If you’re planning to hook up your iPad to a projector, you might have some questions. Here are some frequently asked questions to help you get started.
What cable do I need to connect my iPad to a projector?
To connect your iPad to a projector, you should use an HDMI cable, and an official Apple lightning to HDMI adapter. This adapter will allow you to get a video signal from your iPad to your projector. We recommend using an HDMI cable, as it provides better resolution and consistency than VGA cables.
What should I do if I’m having issues getting a signal on the projector?
If you’re having issues getting a signal on the projector, try restarting both the projector and your iPad. This resolves most of the problems. If you still don’t have a signal, try pressing the source search, or input select button on the projector. This will scroll through all the inputs looking for a signal.
Why doesn’t the image fill the screen on the projector?
The image on the projector may not fill the screen because the resolution or video size from the iPad is different than what’s native to the projector. To fix this, you can generally zoom out to make it fill the screen.
Can I still use my iPad while it’s connected to the projector?
Yes, you can still use your iPad while it’s connected to the projector. When you’re playing video from the iPad, you won’t see it on the iPad itself. Instead, it will take all the video and put it on the projector for you. This means you can keep scrolling or looking for other videos on YouTube while the video is playing on the projector.


